
this is a series of “questions & answers” about using the latex typesetting system. the intended audience is people with a humanities background, especially linguists. please note that many of the solutions presented here are not my own; i simply collected them over the years from various places around the net (forums, tutorials, manuals etc.), so credit goes to the original authors. i’m very interested in improving this q&a, so please let me know if you notice something important missing, if you are having troubles with any of the things recommended here (this is work in progress), or if you know of any better solutions!
what is latex?
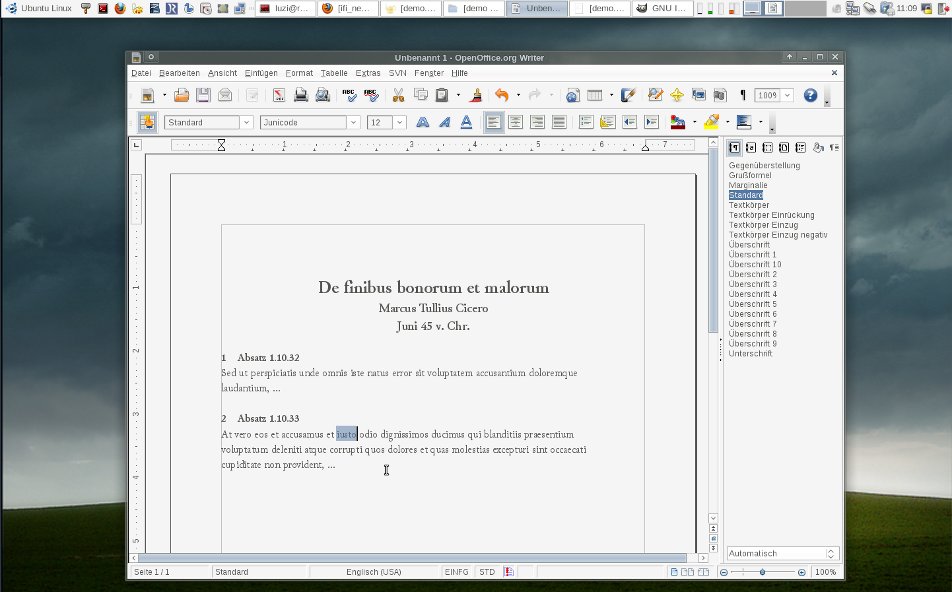
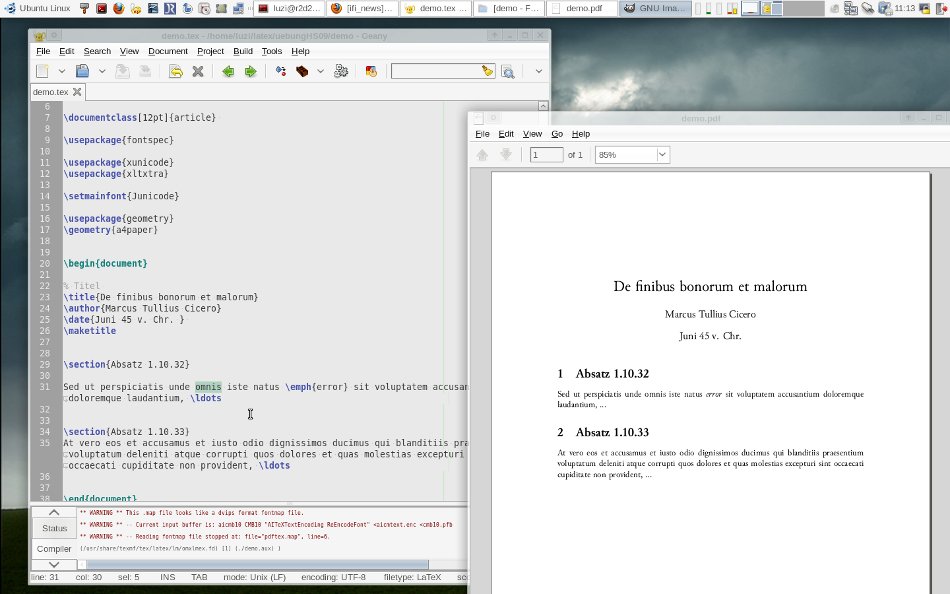
latex (pronounce [la:tex]) is an alternative to traditional word processors like MS Word or OpenOffice. it can produce nicely typeset documents of any kind (articles, books, letters, presentations etc.). the biggest difference to traditional office suites is that there is no ‘page view’ where you actually see the page (or rather: a preview of the page) that you are editing; instead, you type the text (including structuring/formatting commands) into a simple text file, which is then compiled into a document (usually a PDF) in a second step. to visualize this, compare this traditional setup with this alternative setup. this two-step procedure may seem cumbersome at first, but has in fact numerous advantages.
latex is well known and liked by many users world-wide and it has been used for innumerable professional looking publications. it has a large user base in academia, especially in the fields of math, physics etc., due to its superb handling of mathematical formulas, but it can also be used in any other academic or non-academic context.
due to its openness (free and open source), it has been extended by many people in many ways, so that it has become suitable for a wide variety of typesetting purposes.
why would I choose latex over MS Word or OpenOffice?
it would take many words to answer this fully, but to make it short, here’s a summary of latex’s main advantages and disadvantages:
plus
- full control – since you are required to write all formatting/structuring commands explicity in your source file, there are no ‘bad surprises’ or unexplainable things happening to your documents overnight, and there is much less frustration when you need to fix something. office suites use such commands, too, but they won’t let you see them, because they think that they are smarter than you!
- excellent, professional typsetting out-of-the-box – trust me, you will see the difference!
- text based file format – this means, among other things, that your files can’t suddenly become corrupted/unreadable, that you may use any standard text processing tools (like ‘grep’ for searching) on them, that it’s easier/faster to backup, and that it allows you to use a version control system (useful to go back to any previous state of the document at any time)
- stable, proven – latex has been around for many years and it has been used for all sorts of things. it works, it’s reliable, and it has been so for many years.
- free and open source – you can start downloading it right now, without paying a penny, and you are free to study the code and mess with it as you wish.
minus
- some learning curve – you certainly need to invest some time to learn latex’s commands. but it’s not so hard to get familiar with the basics, and there is some excellent learning material available on the internet (and of course in print, too).
- less intuitive – the two-step procedure is certainly less intuitive. after all, it won’t let you edit things right there in the document where you see them. and the source file can get rather complex and hard to read, especially if you are using large, fancy tables.
- debugging can be difficult – sometimes you mess something up, and latex is usually nice enough to give you a useful error message that helps you to fix the problem, but it can still be tedious sometimes. however, it’s still much better than fixing problems in a MS Word/OpenOffice document! (which is pretty much impossible)
- exchanging documents can be hard – chances are that your buddies and co-workers are sticking to traditional word processors, and if you know that you will be collaboratively working on the same documents, it may be hard or even impossible to do with latex.
- non-monolithic, non-centralized design – there is no single authority overseeing the development of latex. rather, the system has grown ‘organically’ over the years. various people have contributed code with differing purposes in mind. as a result, there is a confusing amount of extensions (‘packages’) available today, and many of those do similar things, but they are sometimes not compatible, or at least not designed to operate smoothly with each other. so choosing the right ones, and avoiding any incompatibilities, can be a challenge.
where do i get it?
since latex consists of a large amount of different components, it’s hard to select all the right parts and make a working system out of it. luckily, other people have already done that work for you: they have created latex distributions that include everything you need to get started. you are free to choose any one you like. i recommend to use texlive. follow the installation instructions for your platform.
alright, i installed it – so how do i start this thing?
latex isn’t an application like MS Word or OpenOffice – it doesn’t have a graphical application that you can start from your system menu, or by clicking on an icon. basically, you are supposed to use a text editor to produce a latex source document (usually a file ending in .tex), and then use latex from the command line to translate (‘compile’) this source file into a finished document (usually a PDF-document).
however, many people have designed special editors for use with latex, and these usually offer an easy way (simple click of a button) to run latex behind the scenes and show the resulting output on your screen. most people prefer to use such a latex editor, so that they don’t have to go through the hassle with the command line everytime. note, though, that these editors are not part of latex itself – they simply make using latex easier. if you want to use one of these editors, i recommend texworks, which is still under development, but is shaping up to be a nice, easy, cross-platform editor with a simple, clutter-free design. on mac, you may want to give texshop a try, since that is what texworks was inspired by.
can you recommend a latex tutorial for newbies?
yes, read the not so short introduction to latex for a start.
what is xetex, and why should I use it?
you can think of xetex as a kind of extension to regular latex that has much improved support for handling special characters. it has unicode support built in from the ground up. besides, it works very well together with fontspec, which will allow very easy handling of any TTF fonts that are installed on your computer. if you are using texworks, simply choose xelatex instead of latex from the drop-down list, and you’re all set. xetex is included in texlive and other modern latex distributions, so there’s no need for a separate installation. i highly recommend to use xetex – especially (but not only) for linguists!
could you show me some simple sample documents to get started with?
a minimal example
demo.tex
after compilation, this gives demo.pdfan extended example
with a table of contents and a footnote: demo2.tex
gives: demo2.pdfa sophisticated example
with subchapters, a ‘tabbing’ area, and the use of an external bibliography file: demo3.tex and demo3.bib
gives: demo3.pdfhere’s what you need to compile these samples on your own machine:
- a recent latex installation including xetex
- packages fontspec, geometry, Tabbing, babel, biblatex, parskip must be installed (this is most likely already the case)
- the font ‘Junicode’ must be installed (feel free to change the samples to use any other Truetype font instead)
i don’t like the default font. how do i change it?
the quickest fix is
\usepackage{times}however, if you intend to use a different font besides “times new roman”, you should make use of the fontspec package, like so:
\usepackage{fontspec}
\setmainfont{Junicode} % any TTF font installed on your pc
how do i input special characters?
inputting special characters is a fairly complex topic. there are many ways to do it, and you may prefer one or the other according to your needs. originally, the proper way to do it was to use latex commands to specify special characters. the package tipa by rei fukui was (and is still today) very helpful for this. it lets you input things like \={o} in order to get ō, \textsubring{n} in order to get ̥n or \textglotstop in order to get ʔ.
however, since the introduction of xetex, it has become possible to enter these special characters directly into your input file – no commands needed! provided the font supports it, the character will be showing up in the PDF output without any further ado. of course, your input file needs to be encoded in unicode (utf-8) for this to work.
but now you are probably wondering how to even produce these special characters, since your keyboard most likely doesn’t have buttons for them ;) the answer is that there are in fact a number of methods available for that, but they are mostly platform dependent. one way is of course to find the character somewhere on the internet, and then copy/paste it. that’s much too troublesome, though, if you use these characters often. a better idea is then to use special key combinations to input unicode characters directly. on linux, this usually works with the key combination <Shift>+<Ctrl>+<u>+keycode, and there are similar ways on other operating systems (check this for windows). to find out which keycode a specific character has, you can check wikipedia’s list of unicode characters. if you want to make the inputting even more convenient, you can redefine the keyboard layout system wide (check my previous post on how to do achieve just that on a linux machine).
the default layout looks bad on A4 paper. there’s too much whitespace! how do i improve it?
first, make sure you have the option ‘a4’ in the document class:
\documentclass[a4paper, titlepage]{article}next, use the geometry package to fiddle with the page layout. you’ll need to figure out yourself which values suit your needs, but here are some numbers to start with:
\usepackage[a4paper,height=250mm,width=175mm,vcentering]{geometry}for a5, you might try this:
\usepackage[a5paper,height=160mm,width=110mm,vcentering]{geometry}
i’m having troubles making footnotes in tables – what’s up with that?
according to common typographic wisdom, ordinary footnotes in tables are not good practice. you are supposed to have a separate list of footnotes located at the bottom of the table. however, there are still ways to have regular footnotes. in fact, if you are using longtable instead of the regular table commands (which i recommend to do anyway), this will most likely “just work”.
otherwise, you may want to use \footnotemark and \footnotetext{} instead. this, however, has some problems. first of all, you can’t stack the footnotes (\footnotemark \footnotemark … \footnotetext{} \footnotetext{} will mess up the numbering). second, the text of the footnote will be placed at the position of the \footnotetext{} command, which may not be the same page as the \footnotemark. see the next question on help with this.
footnotes make my source file hard to read! isn’t there a way to define footnotes after a paragraph instead of in the middle of a sentence?
sort of. your first attempt might be to use \footnotemark and \footnotetext{}, and that will in fact work, even outside of tables (which is what it is originally meant for). however, it has the two drawbacks mentioned previously: no stacking allowed and occasional bad placement of the footnote text.
so far, i have not discovered any ‘sane’ way to improve this situation, so i came up with a quick ‘hack’ instead. i use the \footnotemark \footnotetext{} notation and then use a preprocessor (an external script) to transform this into the regular \footnote{} notation.
so instead of this…:
This is an important\footnote{A lenghty footnote.} sentence\footnote{Another not so short note.} in my paper.…you will write this…:
This is an important\footnotemark sentence\footnotemark in my paper.
\footnotetext{A lenghty footnote.}
\footnotetext{Another not so short note.}
…and the preprocessor will automatically convert it to the former notation, to avoid the problems of the latter.
the code for the preprocessor (written in the python programming language) is this:
footnotetexts = re.findall('(?<=\\fnt\{).*?(?=\}\\*n)', doc)

# delete old fnts
doc = re.sub('\\fnt\{.*\}n', '', doc,) # footnotetext{} must end with a newline

#  replace fnm by fnt
for m in footnotetexts:
	m = re.sub('\\','\\\\', m) # replace all backslashes by double backslashes so that e.g. \textbf{} in a footnote will not get destroyed
	fnt = '\\footnote{' + m + '}'
	doc = re.sub('\\fnm(?!})', fnt, doc, 1) # replace only the first instance

print doc
so assuming that the document has been read into the variable doc, we search for all \footnotetexts and save them in a list. then we delete all the \footnotetexts in the document. then we search the document again and replace all the \footnotemarks by the entries in our list of \footnotetexts, wrapping them with the standard \footnote{} command.
the advantage of this solution is that it’s a very simple implementation (only a few lines of code). disadvantages are that it will increase the complexity of the build process and that it is not a “latex-native” solution. and please note that there’s a limitation that you must end every \footnotetext{} with a newline.
for details about the use of a preprocessor and a link to my own preprocessor script, check the question on italicizing text further down on this page.
how can i reference a footnote twice?
\footnote{Bla.label{fn:repeated_fn}}
...
\footref{fn:repeated_fn}
i don’t want the first line of a footnote to be indented. how do i do this?
\usepackage[hang]{footmisc}
\setlength{\footnotemargin}{2mm}
how do i adjust the spacing between footnotes?
% adjust space between footnotes
\addtolength{\skip\footins}{1ex}%% push 1st ftn further from text
\settoheight{\footnotesep}{\footnotesize !}%% space between footnotes
\addtolength{\footnotesep}{1.5ex}%% 10.25pt for 11pt size
latex indents a line that i don’t want indented. how do i fix that?
\noindent This line won’t be indented.
i generally don’t want indented lines at the beginning of paragraphs. how do i do it?
the following will use an empty line instead of indenting to separate paragraphs:
\usepackage[parfill]{parskip}
how do i change the spacing between lines?
\usepackage{setspace}
\setstretch{1.15}
how do i make subscript text (parallel to superscript)?
% subscript
\makeatletter
  \DeclareRobustCommand*\sub[1]{%
    \@sub{\selectfont#1}}
  \newcommand{\@sub}[1]{%
    {\m@th\ensuremath{_{\mbox{\fontsize\sf@size\z@#1}}}}}
\makeatother
then use it with \sub{}.
i want to use “small caps”, but my font doesn’t provide it. how do i set a font specifically for “small caps”?
provided you are using fontspec, this will do the trick:
\setromanfont[SmallCapsFont={Linux Libertine O C}]{Junicode}note that this is for the ‘roman’ font only – you may want to use \setsansfont or \setmonofont instead.
how do i make a “text fraction”?
to make a “text fraction” like this:
try this code:
% text fraction (e/o)
\newcommand{\ffrac}[2]{
	\kern0.1em\sup{#1}\kern-.20em\emph{⁄}\kern-.25em\sub{#2}\kern0.1em
}
then use it with \ffrac{e}{o}.

there are so many different packages for tables… which one should i use?
basically, i recommend to use longtable. it has a couple of advantages, most notably that it wraps nicely across pages.
which package should i use to handle my bibliography?
use biblatex. since this is a pretty new package, most latex tutorials and books don’t mention it, but it’s really great!
here’s one way to use it:\usepackage[style=authoryear,sorting=nyt]{biblatex} \bibliography{mybibliography} % name of your bib file ... \cite{dekeyser1980} ... \printbibliographythe option “style=authoryear” will produce an author/year style citation, which is common in the humanities, looking similar to this:
the option “sorting=nyt”, by the way, will make sure that multiple items by the same author are sorted according to date of publication.

is there a way to set all authors’ last names in small caps?
if your are using biblatex, use this:
\renewcommand{\mkbibnamelast}[1]{{\textsc{#1}}}
\renewcommand{\mkbibnameprefix}[1]{{\textsc{#1}}}
the second lines makes sure that prefixes (as in van Loon, de Vries) will appear in small caps as well.
how do i get biblatex to print van and de in names like van Loon, de Vries?
if your are using biblatex, use the option \useprefix=true when loading the package.
can you recommend a bibliography management application that works well with latex?
yes, jabref is quite good. it’s open source, cross-platform and fairly full featured. if only it weren’t so slow…
i’m working on a large document. how do i speed up the compilation?
divide the document into sections and save each one of them in a separate .tex-file. use \include to include the sections in the main document. then use \includeonly{section1} in the preamble to compile only section 1 while preserving the page numbers, references etc.
what’s the easiest way to make frequent backups?
what has proved to work best for me is to use a version control system like subversion. this is usually used by software engineers to keep track of the source code they write, but it works just as well for (text based) documents. since latex files are simple text documents, they are well suited for version tracking. the benefits are obvious: keep an authoritative version of your work in a central archive (somewhere on a server), and sync your changes with that version on a daily basis. that way, you always have the latest version on at least one other machine than your working machine, and you can only lose one day’s work at maximum in the case that your machine suddenly dies. note that this also makes syncing your documents between two computers (home and office, for example) extremely simple.
note: installing and setting up a subversion repository requires some technical skill, so be warned that it may take a while to figure out the details if you are not already familiar with the process. if you don’t feel comfortable using the command line, this is probably not for you.
an easy alternative is to use a cloud-storage system like dropbox. those services will let you store some data on a server by simply copying it to a specific folder on your pc.
what’s a good way to synchronize my latex files between two places (e.g. home and office)?
see previous question.
i’m a linguist and i need to put lots and lots of words into italics. using emph{} everytime is cumbersome and makes the document hard to read. isn’t there a better way to do that?
indeed, you might find something like this ugly:
Got. \emph{kniu}* und \emph{triu}* und die n. \emph{wa}- bzw. \emph{a}-Stämmelatex allows you to redefine commands, so what you could do is to redefine \emph{} to something shorter, like this:
\newcommand{e}[1]{\emph{#1}}
Got. \e{kniu}* und \e{triu}* und die n. \e{wa}- bzw. \e{a}-Stämme
but this is admittedly not much of an improvement. wouldn’t it be much nicer to use the following markup?
Got. /kniu/* und /triu/* und die n. /wa/- bzw. /a/-Stämmeand indeed, there is a way to do this. however, it can’t be handled inside latex, because it isn’t sufficient to redefine a simple command (note that / needs to be replaced by \emph{ sometimes and } at other times), so it’s a little bit more work to get this going. what we need is a small script that does these substitutions in an intelligent way, a so-called pre-processor. the good news is that i’ve already written one such pre-processor, using the python programming language, and you are welcome to use it. our source document will then need to be run through this preprocessor before it’s being sent to latex. this requires a somewhat more sophisticated workflow, because we don’t want to type the command manually to run the preprocessor every single time we want to compile our document. the solution to this is to use a makefile. makefiles are a unix/linux tool, so for the following, i’m assuming that you are on such a system rather than on windows (there might be some way to get this to work on windows, too – i just don’t know). so to try this, download the file demo.tex and save it somewhere, along with preprocess.py.txt (remove the .txt ending) and Makefile. then open a shell, go to that folder and use make to compile your document. note that you need a couple of things installed on your computer for this to work (support for the python programming language, and support for Makefile).
note that there are some disadvantages: first of all, using Makefile may not be desirable in your work setup. second, there is now a conflict when you want to use a regular forward slash /, because this is now always interpreted as the beginning/end of an emphasized area. for that reason, you need to use \/ (a backward and a forward slash) to get a / in your document.
i prefer to use a simple text editor for writing latex documents. is there a way to compile and display the output with a simple key press anyway?
probably yes, but it depends on your editor. most editors (at least the programming oriented ones) will let you execute a build command by a single keypress. so use a Makefile (see last question), and then configure your text editor to run make in the current directory on a specific keypress (often F9 is used for this). if you then set up the Makefile in a way that it will automatically load a PDF-viewer on the default make target (check the commented section in my Makefile), you will see your document pop up immediatly after pressing F9 – very convenient!
can i make a powerpoint-style presentation with this?
yes, you can. use the package beamer for this. please note that the resulting document will still be a PDF, so you cannot do any fancy animations (who needs those, anyway?!). uncovering a slide bullet-by-bullet is of course possible. this works by simply adding a new page for every “step”, and then using the page-down key to give the “illusion” of an animation. as a consequence, a 10-slide presentation may easily turn out as a PDF of ca. 50-80 pages.
do you have any templates for common document types typically needed by students?
handout
template-handout.tex and template-handout.bib.
output: template-handout.pdfpaper
template-paper.tex and template-paper.bib.
output: template-paper.pdfpresentation
template-presentation.tex and template-presentation.bib.
output: template-presentation.pdf
feel free to use these and to adapt them to your needs.
comments are welcome :)
